This photo was shot on a sunny morning over the summer. I pulled it out of my archives in part to re-edit it. In my Photoshop class we have covered split toning and I thought this image might be a good candidate for that. Here is the edited version:

ISO 200 50mm f/5.6 1/250
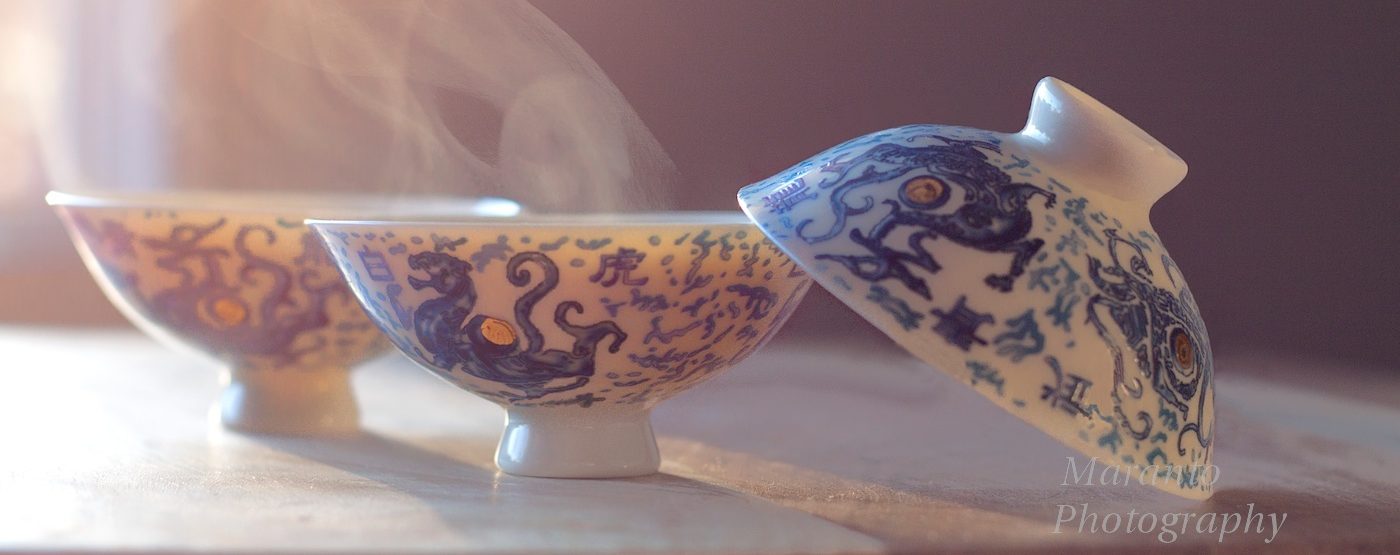
Here is the original photo:

ISO 200 50mm f/5.6 1/250
Split toning can be done in Camera Raw if you have Photoshop. Basically what I have done is first convert the image to grayscale. Split toning then allows you to bring a hint of color back into your photo. In this case I set the hue slider to yellow and bumped up the saturation until I go the image that you see. I then sharpened the image a bit.
Photoshop is not the only editing software that has split toning. If you are interested in knowing a bit more about the topic I would recommend this blog post by Sonel. I have provided a link to a post she wrote about a month ago where she explains in some detail how it works. She has also included screen shots of her process which are very informative.
This post was written in part as a response to the WordPress weekly photo challenge which has the theme, Good Morning!
Thanks for stopping by, feel free to leave a comment about split toning or my image in the comments below.
Cheers!

Both versions are lovely!
LikeLike
Thanks!
LikeLike
Nice photo. Interesting to see the before and after. Do you generally shoot in RAW or RAW + JPG? I struggle with how much space that takes on my had drive for what is at best mediocre images.
LikeLike
I do shoot both, and then I delete a lot after I have the images on my camera transferred to my computer. It does require me to keep up with cleaning up, which I am getting better at doing 🙂
LikeLike
Beautiful….what did we do before Photoshop♥
LikeLike
Hours in the darkroom 🙂
LikeLike
Interesting technique, and a nice look.
LikeLike
Thank you, I’m new to it, but I find it interesting.
LikeLike
they ar e both pretty for my untrained amateur eyes.
LikeLike
Thanks 🙂
LikeLike
I am quite intrigued bt your Photoshop classes.
will have a look at sonel’s blog 😀
LikeLike
Sonel spends a lot of time editing photos for fun and she often writes about her process. I find her posts about her process to be easy to understand 🙂
LikeLike
What a difference it makes – I like both of them!
LikeLike
Thank you, and it is pretty cool the way I know have two completely different images.
LikeLike
My fave is the bright, sunny yellow one. I know Ansel Adams is a national treasure, but I still prefer colorful photos.
LikeLike
It’s funny because I am a fan of Adams, but mostly shoot in color.
LikeLike
That must account for why I’m a huge fan of your work. 🙂
LikeLike
Knew there had to be a reason 🙂
LikeLike
Pingback: Weekly Photo Challenge: Very Good All Vinyl Morning | Humbled Pie
Wow! Love your split-toning edit and the original PJB. It’s really gorgeous! And thanks so much for mentioning me hon. I am also still learning about this and will hopefully have more time to experiment more. Thanks for the great post and shots. 😀 *hugs*
LikeLike
I can tell from my stats that a few people have clicked over to have a look. I put the link in because I really like your posts where you explain your process, I find them easy to understand. It helps that you included photos of the steps. I know that is extra work for you to include the photos, but I find it to be a great help. Cheers!
LikeLike
Pingback: Weekly Photo Challenge: GOOD MORNING! | The Adventures of Iñigo Boy
Pingback: Weekly Photo Challenge: Good Morning Monkeys | Processing the life
Pingback: Good Morning from Ireland! | Ireland, Multiple Sclerosis & Me